Ride a bike, share your experience and love. When I go biking, I repeat a mantra of the day's sensations: bright sun, blue sky, warm breeze, blue jay's call, ice melting and so on. This helps me transcend the traffic, ignore the clamorings of work, leave all the mind theaters behind and focus on nature instead. I still must abide by the rules of the road, of biking, of gravity. But I am mentally far away from civilization. The world is breaking someone else's heart. ~Diane Ackerman

Picture Policy, Etc

Photograph Use Policy - If I photographed it and you would like to use it, go ahead, just give me credit if possible.

BICYCLEFRIENDS is on FACEBOOK. Click Here to Join

Search This Blog

Monday, October 27, 2008

Performance Bike - How to Dress for the Cold

"Performance Bike - How to Dress for the Cold"
Source: www.performancebike.com

This little news/infocast I rec'd from Performance Bike offers great information about dressing for the cold. Time to pull out your wind breakers, long sleeve jerseys and etc. For So. California, I usually wear a base layer tee, arm warmers and full finger gloves. At most temps around So. California this setup works fine. I'm thinking about getting a decent wind breaker and a long sleeve base layer.


Cycling is an activity that produces heat and sweat. This winter your challenge is to create and hold the first while avoiding the consequences of the second. And you can do by dressing right.

It all starts with layers... Plan your day and dress for the coldest part but with the options to tailor your comfort by adding or shedding clothes. You want to remain comfortable w/o over heating. Remember with layers if you are too hot, you can always remove something. Too cold add something.

Rule #1: Start with a wicking base layer. It’ll keep your trunk dry and warm.

Rule #2: Protect your vital head, neck and trunk. If they are warm it will take less to protect your hands, legs and feet.

Rule #3: Always avoid cotton except for post ride celebrations. It traps heat robbing sweat next to your skin. Use polyester, and lycra and wool. Combining your existing cycling gear with a few new garments will extend your comfort range much later in the year.

Rule #4: Dress like a bag lady. Pile on the gear. You probably have the basics: lycra shorts, short sleeve jerseys, fingerless gloves and , socks. With base layer T-shirt, tights or leg warmers, full finger gloves or liners, shoe covers, long sleeve jersey or arm warmers, skull cap and a vest, you’ll be able to ride a month longer and start a month earlier.

Rule #5: Start off slightly cold. You’ll warm up in 10 min of riding. This minimizes sweat build up. If in doubt stash an extra garment like an extra jersey, vest or skull cap, in your pocket.

For deep winter you’ll need just a few more garments: insulated tights, long sleeve jersey, insulated windproof jacket, insulated gloves, shoe covers, balaclava, and winter socks.

Basic 4 Seasons Wardrobe:

Upper Trunk:
    –Sleeveless base layer
    –Sleeved base layer
    –Short Sleeve jersey
    –Arm Warmers
    –Long Sleeve jersey.
    –Vest and/or Windproof Jacket w zip off sleeves
    –Windproof shell
    –Waterproof jacket
Legs:
    –Lycra shorts
    –Leg warmers and/or knee warmers
    –Tights
    –Insulated tights
    –Windproof tights
Head/Neck:
    –Coolmax skull cap
    –Balaclava
Feet:
    –Winter wool or polyester socks
    –Shoe covers
Hands:
    –Fingerless gloves
    –Thin full finger gloves or liners
    –Insulated windproof gloves

Dress for the coldest part of the day and shed layers to remain comfortable:

Coolish:59°-70°
    –Trunk and Arms: Sleeveless base layer, short sleeve jersey, arm warmers
    –Legs: Lycra shorts and knee or leg warmers
    –Hands: Fingerless gloves

Cool: 49°-59°

    –Trunk and Arms: Sleeveless base layer, short sleeve jersey, arm warmers, wind jacket with zip-off sleeves
    –Head: Thin coolmax skull cap
    –Legs: Lycra shorts and thin lycra tights
    –Hands: Full finger wind resistant gloves

Coldish: (39°-49°)

    –Trunk and Arms: Sleeved base layer, long sleeve jersey, waterproof jacket
    –Head: Balaclava protects neck from wind and cold
    –Legs: Lycra shorts and tights with brushed fabric interiors
    –Hands: Full finger gloves with insulation
    –Feet: Shoe covers

Cold: below 39°

    –Trunk and Arms: Sleeved base layer, long sleeve jersey, short sleeve, more as needed, waterproof jacket with insulation
    –Head: Balaclava with brushed fabric or insulation. Balm on exposed skin
    –Legs: Lycra shorts and tights with brushed fabric interiors and wind and waterproof fronts
    –Hands: Full finger gloves with insulation
    –Feet: Shoe covers with insulation

Sunday, October 26, 2008

Monroe Truck Trail: Yellow Jackets, Ricky Bobby and a few crashes along the way!

Monroe Truck Trail turned out to be a hit! I rolled up early to see Carl waiting and stretching. His hip/sciatic was giving him trouble but he was optimistic about this ride. As we waited, we wondered about who will show up. I had a count of 6; Me, Carl, Kevin, Johnny, Gabriel, and Memo. This was good because, with the number of trucks, we could shuttle one tightly packed truck load up per run. I was hopeful and figured 3 runs down Monroe Truck Trail for a total of 24 miles.

Around 8:00 am everyone else started showing up. Kevin, Bobby, Memo, Marco, Marlow, Ed, Johnny and Gabriel. Total count 10 riders. We then shuttled up to GMR, turned off the road and loaded trucks with bikes. We decided on 2 trucks to shuttle up to the top of Monroe Truck Trail, giving us a total of two runs down the mountain.

*** Note at the top of GMR/Monroe Truck Trail you need adventure passes. You can purchase them at your local Big 5. An Annual Pass is $30.00 (you can get a second for $5.00 more) and a day pass is $5.00. ***

We trucked up GMR and at 8:00 am it was sunny and clear. There was a lot of activity on the road, from Roadies to Motorcyclist and "Import" racers. I like the Roadies but the Motorcyclists and "Import" racers I could do with out. More often than not they are speeding up and down the windy mountain road putting everyone in danger. Earlier this year GMR finally reopened after being closed to motor vehicle traffic for over 2 years. Prior to the reopening, GMR was a great spot for cycling, hiking and street luge.

It took about 15 minutes to get to the top of GMR/Monroe Truck Trail. We unloaded bikes, checked tire pressure and etc. Carl forgot his helmet in his car (at the bottom of GMR). Worst case scenario, Carl breaks his fall with his head, no biggie.

We hit the trail at about 8:53 am. Johnny lead the pack, then Gabriel and Marlow. These three were the fastest of the pack. Johnny is young and fearless, Gabe is fearless and CRAZY, while Marlow is just crazy. I found out his nick name is Ricky Bobby (Enough said). I'd best describe Monroe as an unkempt fire road. There were patches of overgrown bushes throughout and parts where half the trail was washed out. Some sections of Monroe got really tight and my legs received multiple lashings from the many bushes.

About three miles down Monroe, Gabe and Marlow took a short cut down a steep and loose single track. The rest of the group headed down Monroe and we regrouped at the start of Mystic. It took awhile for Gabe and Marlow to show up and when they did I asked what took them so long. Gabe took a big fall and was scratched up pretty bad. Down the single track Gabe lost control of his bike and went over the cliff. He was hurt pretty bad and I'm sure tomorrow morning he will be sore.

From Monroe we linked up to Mystic and headed down. Mystic is like the icing on the cake; its steep, loose, bumpy, narrow and fast. You have to hang on and let your bike do all the work. The middle section of Mystic, I think 7 of us ended up walking. At the bottom end of Mystic there where Boy Scouts on the sides of the trail. They were maintaining the trails but at this particular moment their shovels and rakes were lying across the trail. Next to them was a swarm of hornets, mad as hell. One of the Boy Scouts disturbed their nest and a swarm formed blocking us from the end of the trail.

It took us awhile to figure out what we were going to do. Bobby and Ricky Bobby ended up riding through the swarm, bad idea. Bobby went down and crashed hard into the cliff wall. From my point of view it looked like he smashed his head and shoulder right into the wall. Ricky Bobby ended up crashing and ditching his bike as the swarm of hornets attacked him. I decided to go next and was bitten on the ear and on top of my head.Marco , Memo and Kevin also took hits as well.

Total trip down Monroe, one hour. We loaded up the bikes again and started the trek over. This time only Carl, Johnny, Kevin and I went for a second run.

Wednesday, October 22, 2008

CORRECTION! ***Dalton Road - 10/25/2008 MTB

Correction *** This is Monroe Truck Trail ***
Dalton Road - MTB Ride

Day: 10/25/2008

Time: 8:00 am

Meeting Place: Glendora, CA at Sierra Madre and Glendora Mountain Road

Notes: Shuttle Runs Up GMR to Dalton Road. This will be an awesome Downhill Experience! We are going to shuttle up Glendora Mountain Road to Dalton Fire Road. If we have enough trucks we could do this 3 times! It will be 8 miles of blissful downhill consisting of Fire Roads and fast single track! Let me know if you are interested! We will meet at Sierra Madre and Glendora Mountain Road at 8:00 am.


View Larger Map

Tuesday, October 14, 2008

Turnbull Canyon - 10/18/2008 MTB Ride

Ride: Turnbull Canyon - Mountain Bike Ride

Day: 10/18/2008

Time: 8:00 am

Meeting: Beech Hill Ave & Orange Grove Ave Hacienda Heights, CA 91745


View Larger Map

Directions:
Turn right to merge onto I-10 W toward Los Angeles 2.6 mi
Take exit 42 for State Hwy 57 S toward Santa Ana 1.3 mi
Merge onto CA-57 S 4.1 mi
Slight left at CA-60 W (signs for Los Angeles/CA-60 W) 9.4 mi
Take exit 14 toward Seventh Ave 0.3 mi
Turn left at Gale Ave (signs for Gale Ave/Seventh Ave/Hacienda Heights) 381 ft
Turn left at 7th Ave 0.8 mi
Turn right at E Orange Grove Ave 0.2 mi


View Larger Map

Monday, October 13, 2008

Another Custom T-Shirt

Friday, October 10, 2008

Bicycle Friends T-Shirt Design

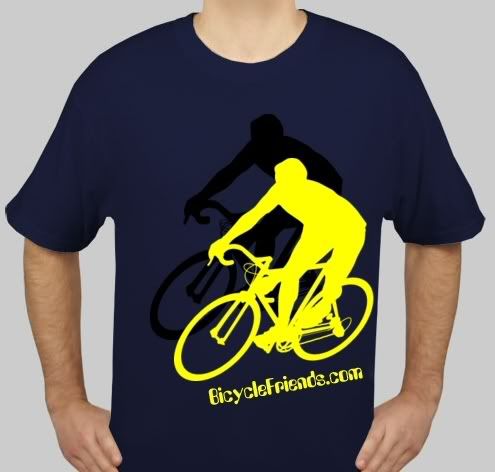
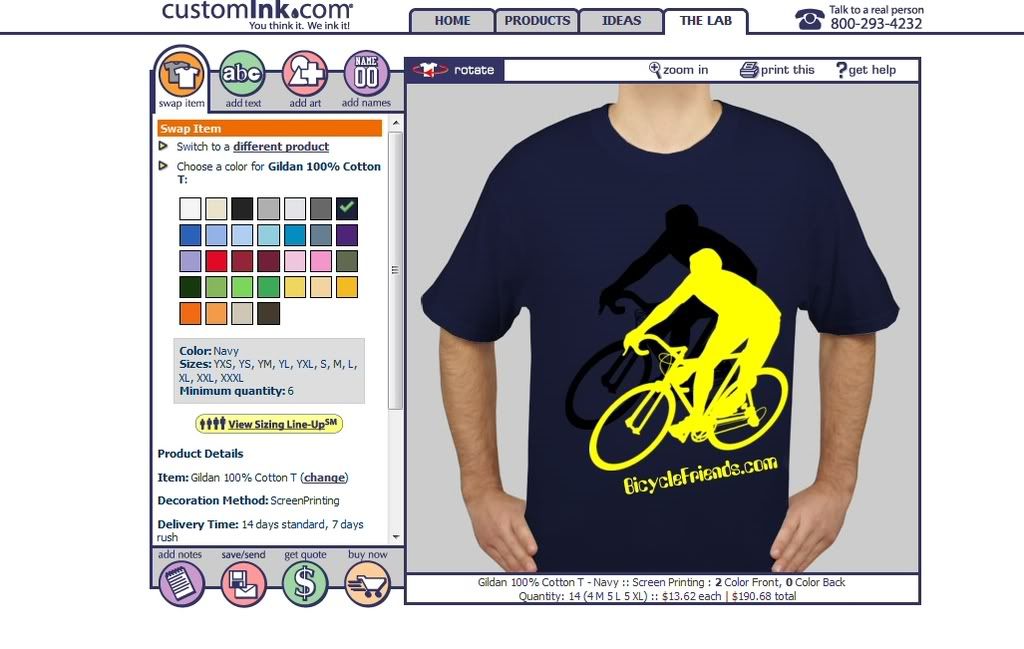
There is a website called www.customink.com that makes custom made to order t-shirts. I was just having fun and decided to try my hand at a BicycleFriends.com t-shirt.

What do you think? I chose the Gildan 100% Cotton in Navy. This is the same brand we use for our CANIDAE t-shirts and the quality is good. Customink.com lets you choose various royalty free art and the guy on the road bike picture looked the best. I duplicated the picture and put in the background one in black and in the foreground one in yellow. The yellow is slightly offset to give a "shadow" effect. I thought this was clever on my part. Finally, I added my www.bicyclefriends.com at an angle to give the whole t-shirt an touch of motion.

Sunday, October 5, 2008

Single Speed on a budget!

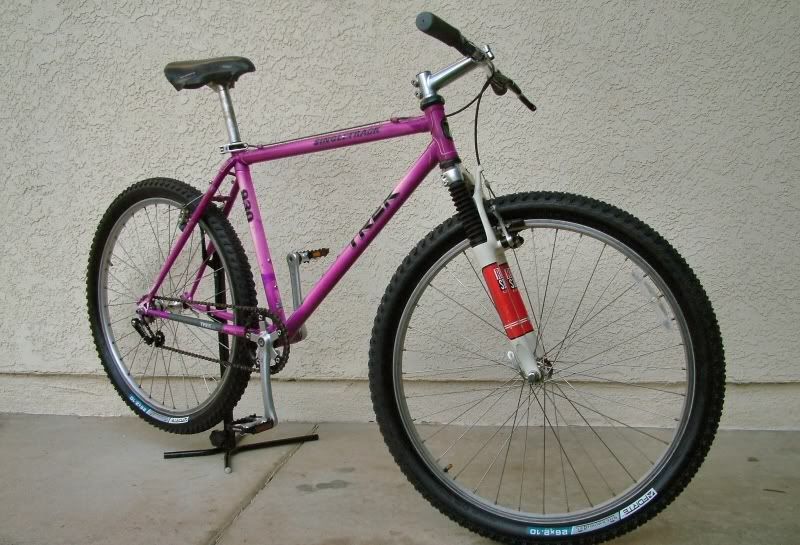
A friend brought me a project bike last Monday. An old Trek 920 was presented to me, faded pink or purple with dirt, rust, grime, flat rotted out tires and broken 21 speed Shimano shifters. Her request was to clean it up and get it in working order for a commuting bike from home to work (A distance of 2 miles round trip).
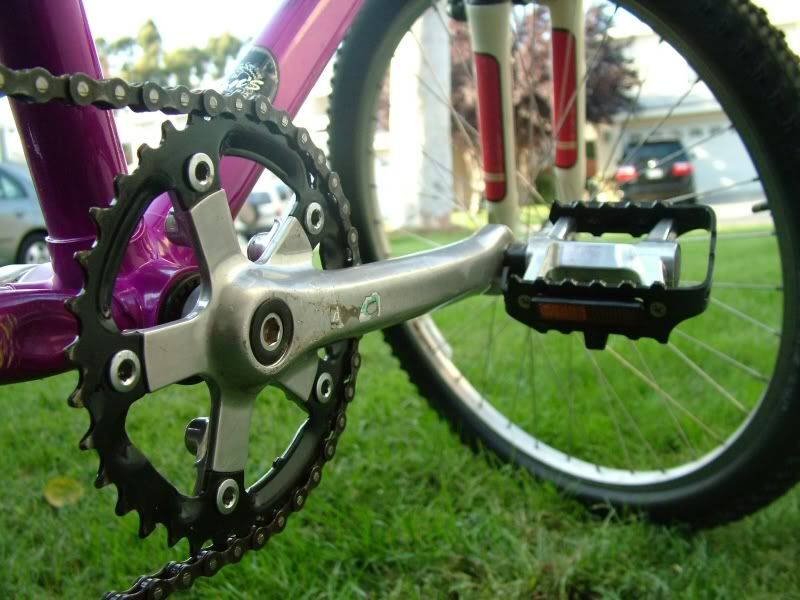
She didn't want to spend to much to get it working so I opted to trash the busted shifters and convert it to a single speed. Yipee! This would be my first SS conversion. I quickly started "researching" SS conversions on mtbr.com, created my inventory checklist and surfed performancebike.com, nashbar.com and jensonusa.com for parts.The take down. Once I got the Trek 920 to my garage, I started dismantling the excess parts; shifters, gone, front and rear derailers, gone, rotted tires and tubes, gone. I removed the crank arms, 42t and 22t chain rings. Okay now the cassette, gone.

I decided to order my supplies from performancebike.com, they had the best deals and shipping wasn't to bad. I ordered, tires, tubes, rim tape, pedals, grips, forte SS conversion kit and a few other misc items. A few days later, the parts were delivered to my work.

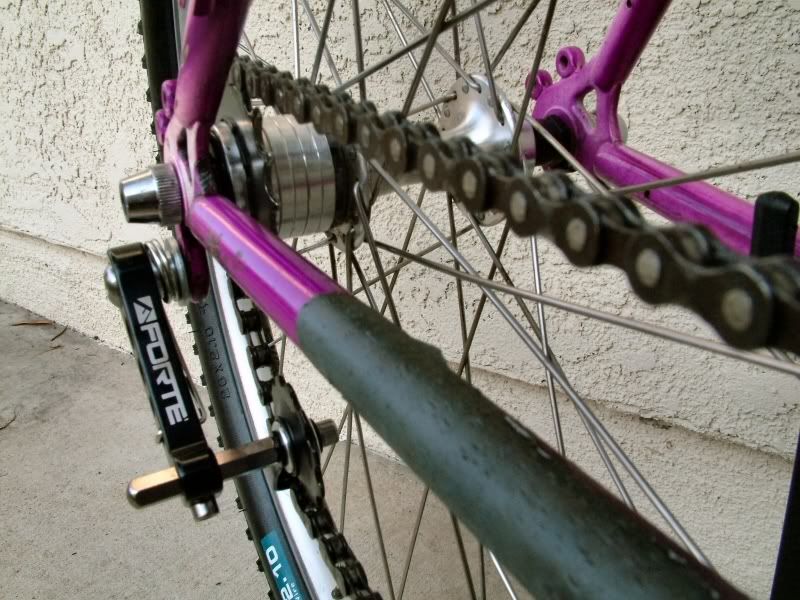
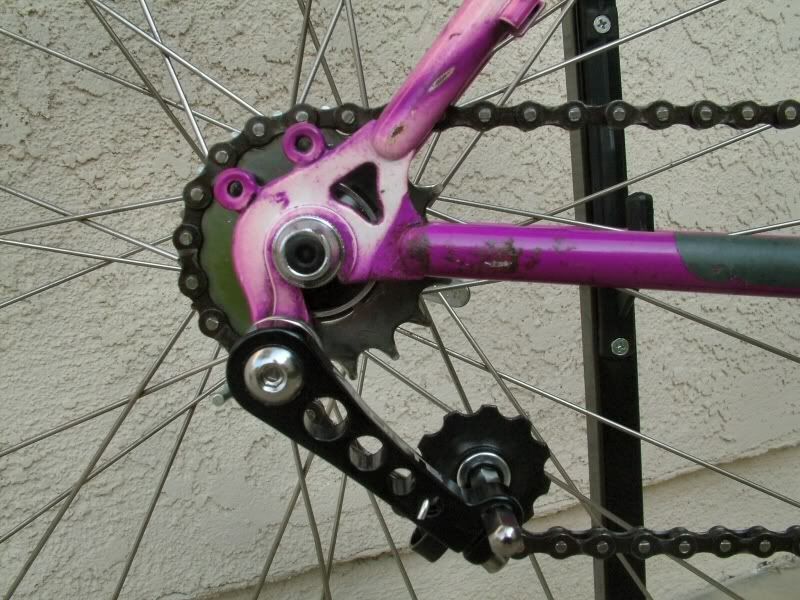
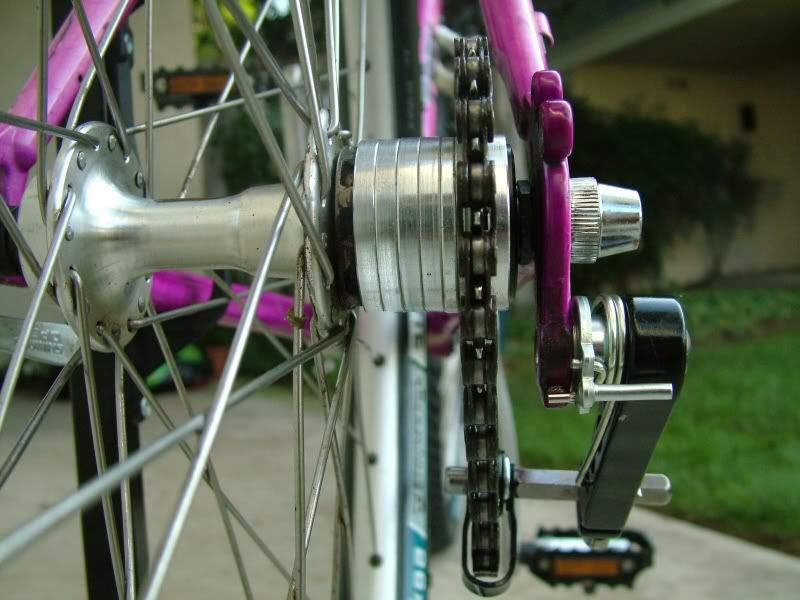
The build was surprisingly easy. The only "semi-dificult" part was getting the correct chain line and proper tension on the forte SS hanger. The trick it to get as much chain tension AND as short a chain length possible. Do this and your chain will not skip.

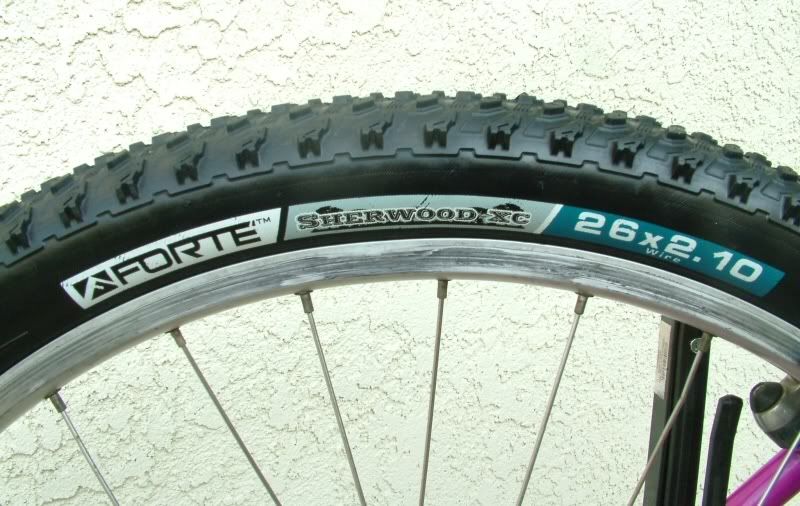
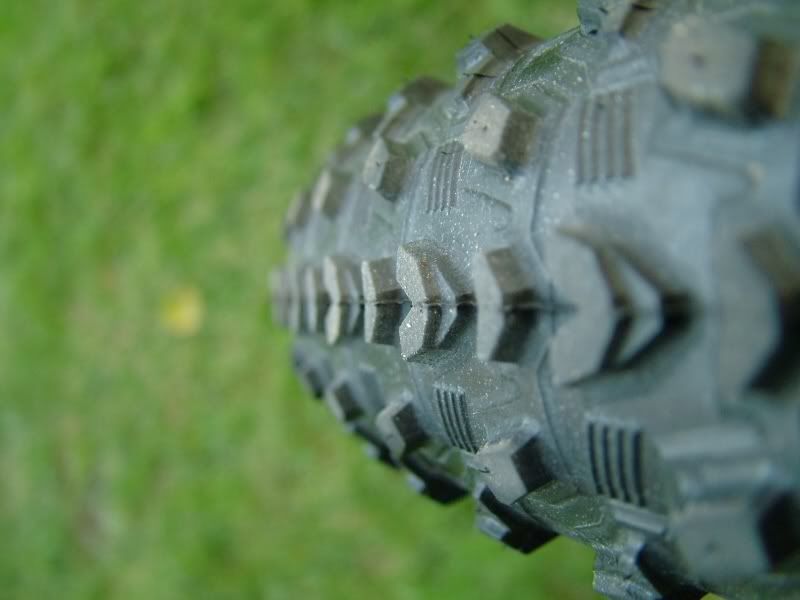
I ordered these Forte Sherwood XC Tires. They have a nice tread pattern suited for the type of riding my friend will be doing. The Forte Sherwood's aren't too aggressive and have a lower profile for less rolling resistance.
Photobucket - Video and Image Hosting
These tires remind me of Bontrager Jones XR tires I once had on my Trek Fuel Ex. Trek categorizes the tires as XC and I'm sure Forte had these in mind when they created the Sherwoods. The claimed weight for these tires are 640 grams each! Ouch!
Photobucket - Video and Image Hosting
The whole project was about $70.00 and it could have been even cheaper if I opted to not buy the Forte SS Conversion Kit (On sale $21.99). According to some of the SS DIY sites you can jimmy your rear derailleur's limit screws to get similar results or if your really lucky enough you can get the right chain tension between the front chain ring and rear sprocket. I chose the kit and recommend it over luck and jimmy! :)
Related Posts Plugin for WordPress, Blogger...